Or, how I spent my summer vacation
Behold, the story of the greatest silverware tray ever designed by a computer scientist.The Problem
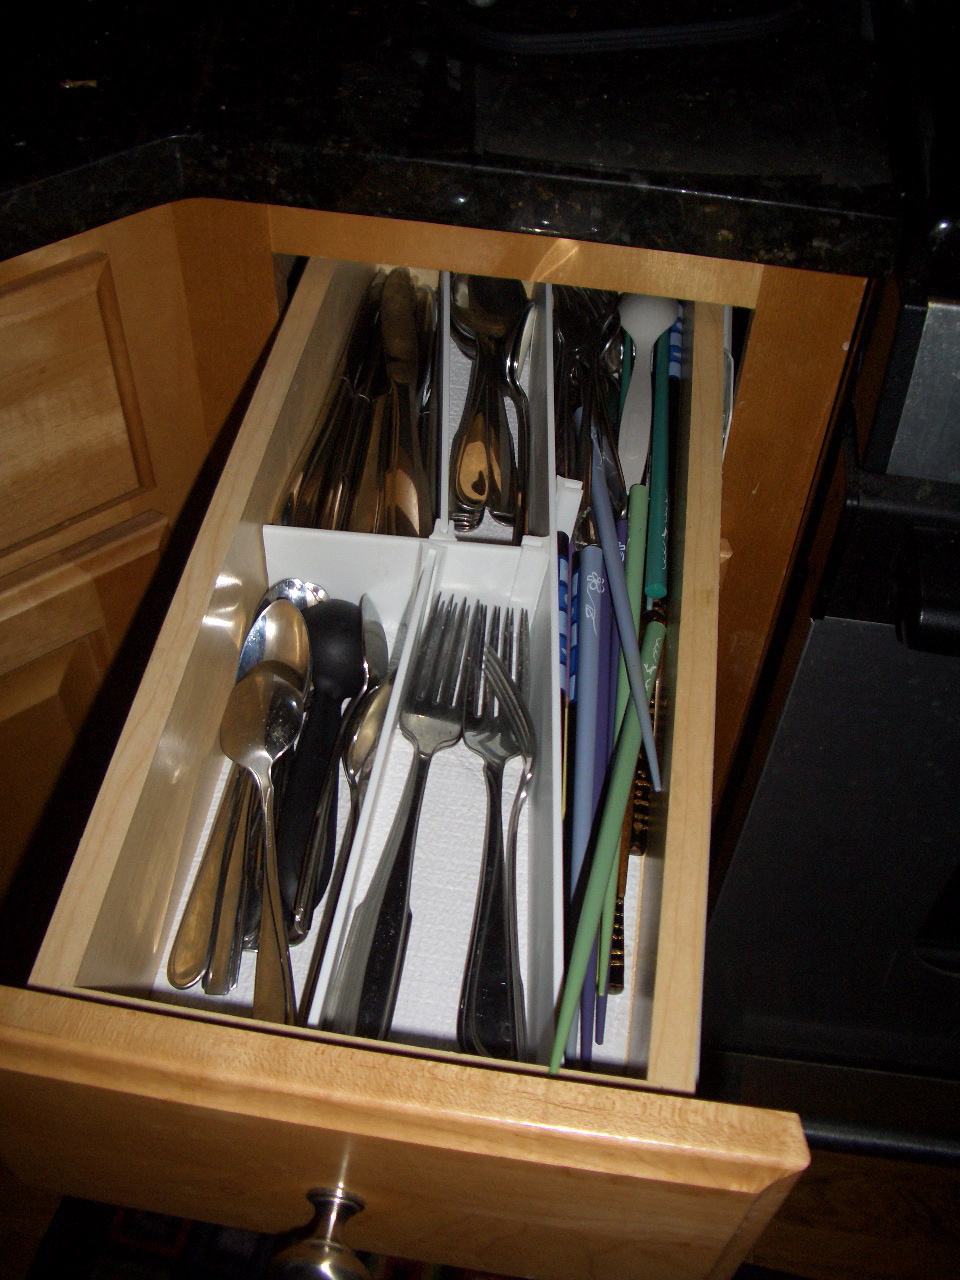
The kitchen drawers in my condo have internal dimensions 6.4in by 17.5in. No one (and I've been looking for two years now) sells a flatware tray with similar long but narrow dimensions. An array of baskets would consume too much space with internal and external fragmentation (the bins would be partially empty, and the drawer would be partially empty of bins).
In the picture, you see the mess that results with "Custom Drawer Organizers" that I found at The Container Store -- it's a challenge to get strips cut precisely, the adhesive doesn't stick well enough, and the strain of a heavily loaded drawer is a bit much. (They would be great, though, for less heavy use.)
I had a few constraints too: I use spoons, forks, and chopsticks often, so they should be at the front; knives, salad forks, and large spoons rarely, so they should go to the back. And did I mention my condo is small? No space to waste.
The Materials

Z-Printer 310
It's a 3D printer! You can design objects, and then print them, no stereoscopic glasses required!See Z Corporation's Page for the details. They describe the 310 "Plus", the successor, which I'm sure is better.

SolidWorks
I like to call it "Solid Work" because Francois has convinced me that plural are optional. I used an old version; it's likely that any bugs or limitations were worked out by now.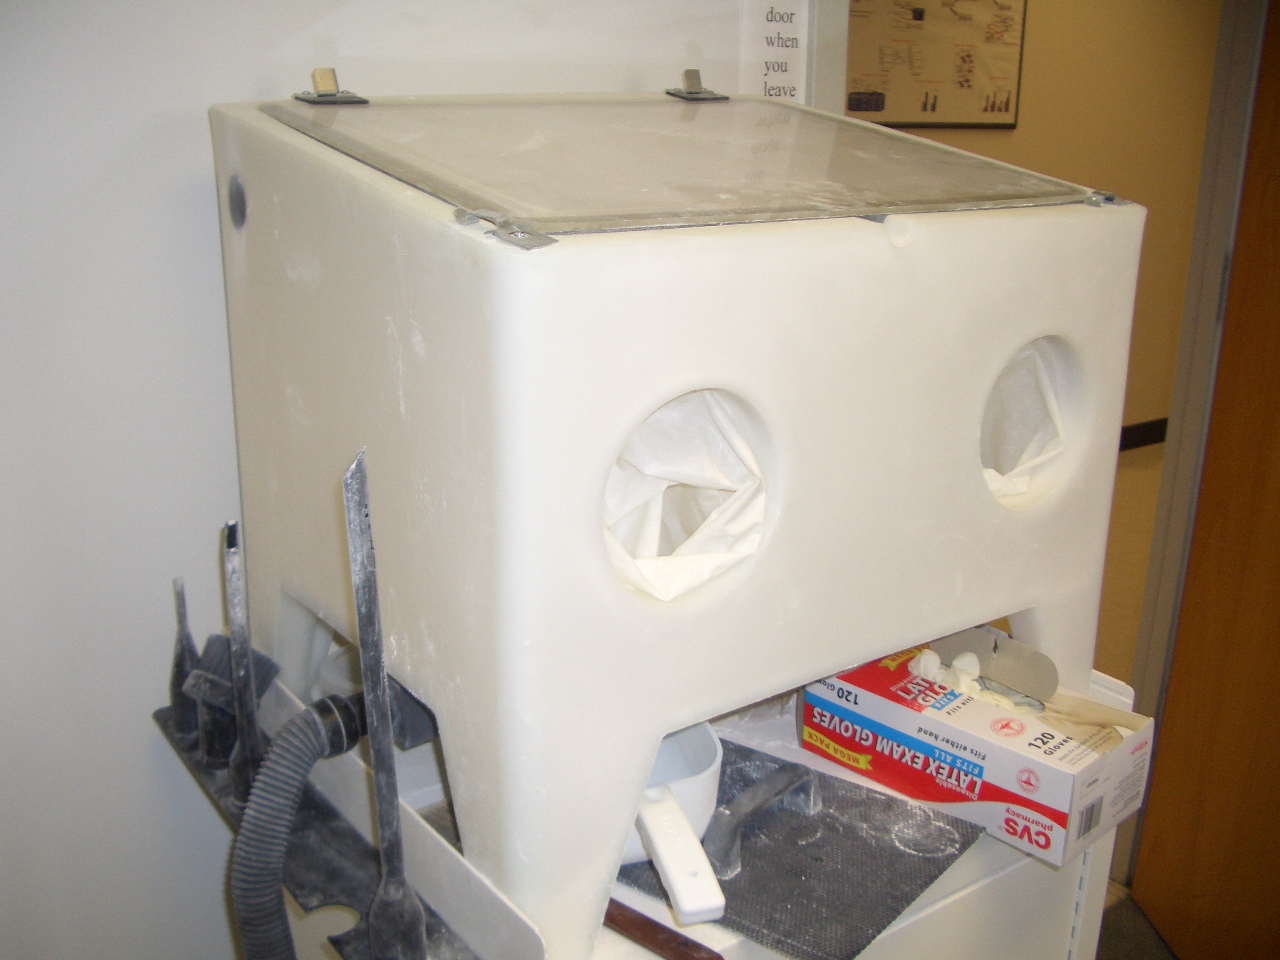
The Depowdering Station
Much less glamorous than the 3-D printer, but lots of fun, is the depowdering station. In the cabinet is an air compressor that pushes air through a tiny needle for blowing powder out of small crevices. At the side is a vacuum to suck the powder dust out of the air. On top is a clear plastic lid. The holes in front are for arms, like reaching into an incubator.
Revision 1
Planning
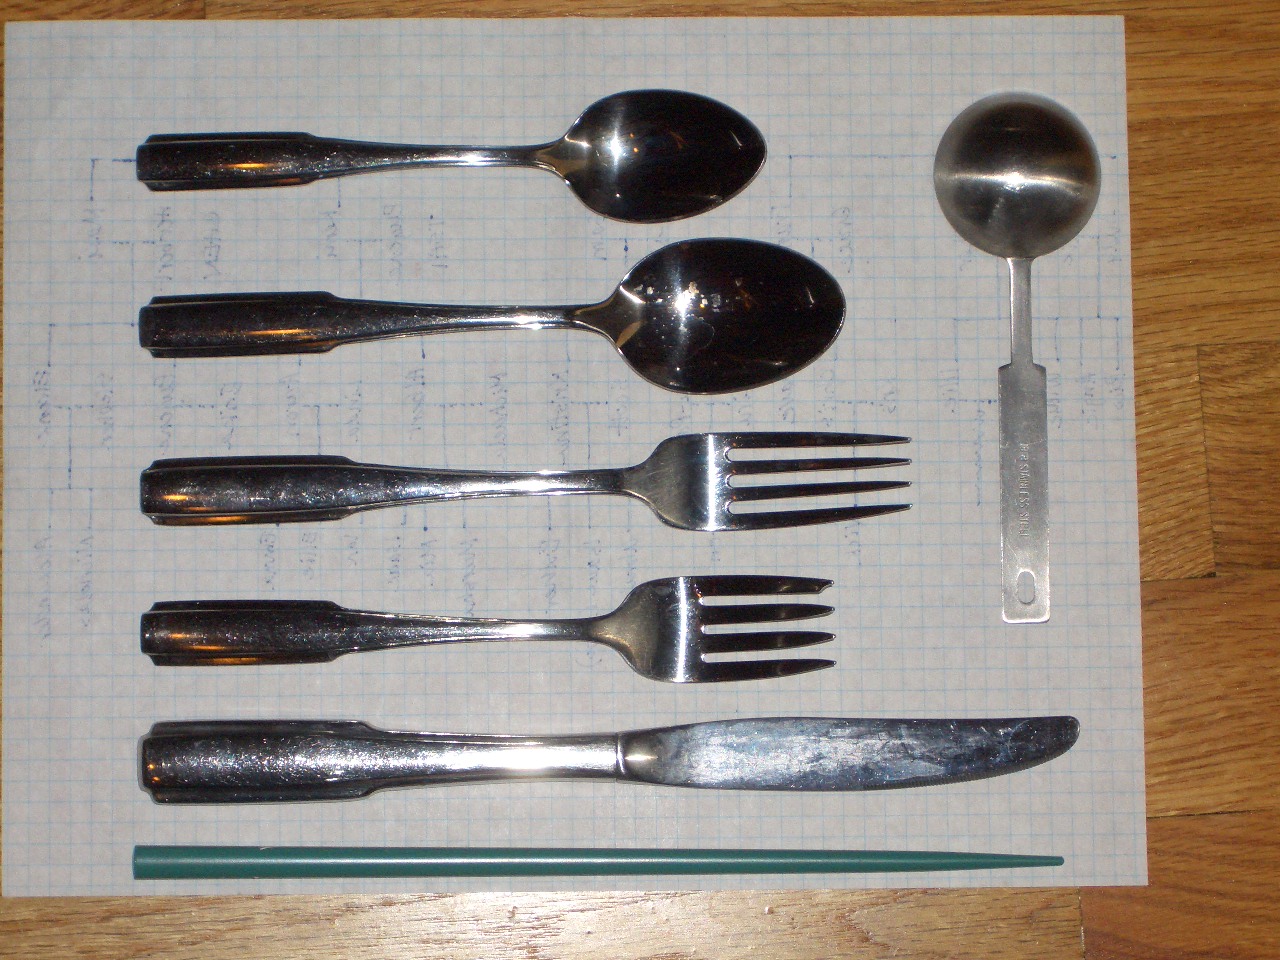
My first step was to carefully arrange all the items on graph paper, so that I could measure their dimensions quickly and without carrying silverware around.
There are five squares per inch on this paper.
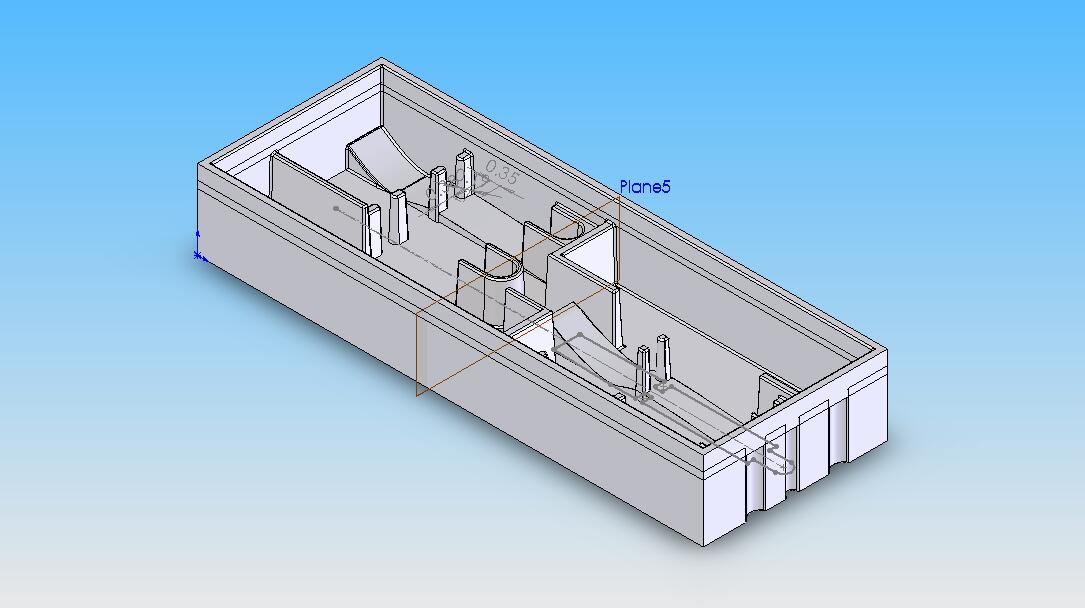
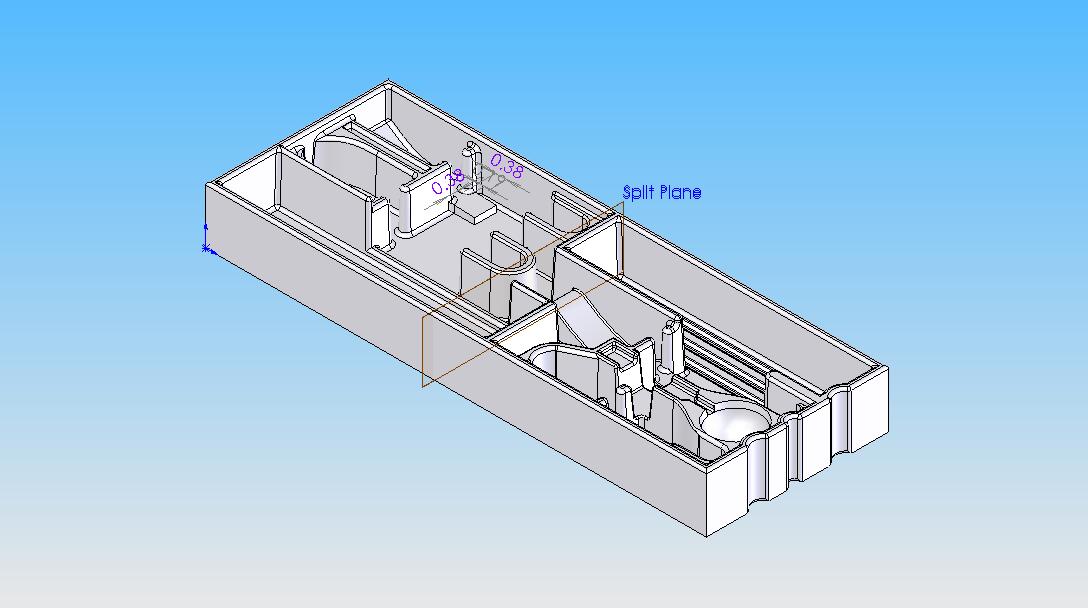
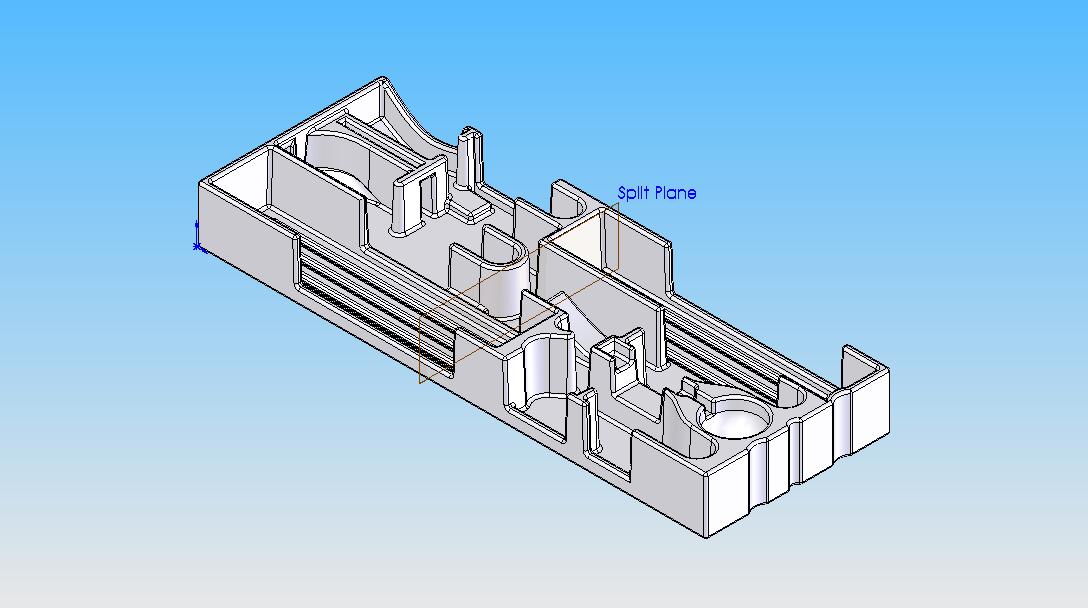
A draft
I arranged posts to steady the handles of forks and spoons, and made compartments for the chopsticks and knives. The contours to the bottom right in the image are where screws hold the face of the drawer to the box. Plane5 is the plane that will bisect the shape for printing: the maximum dimensions of the Z-Printer are 8x8x10 inches, so it will have to be printed in two parts.
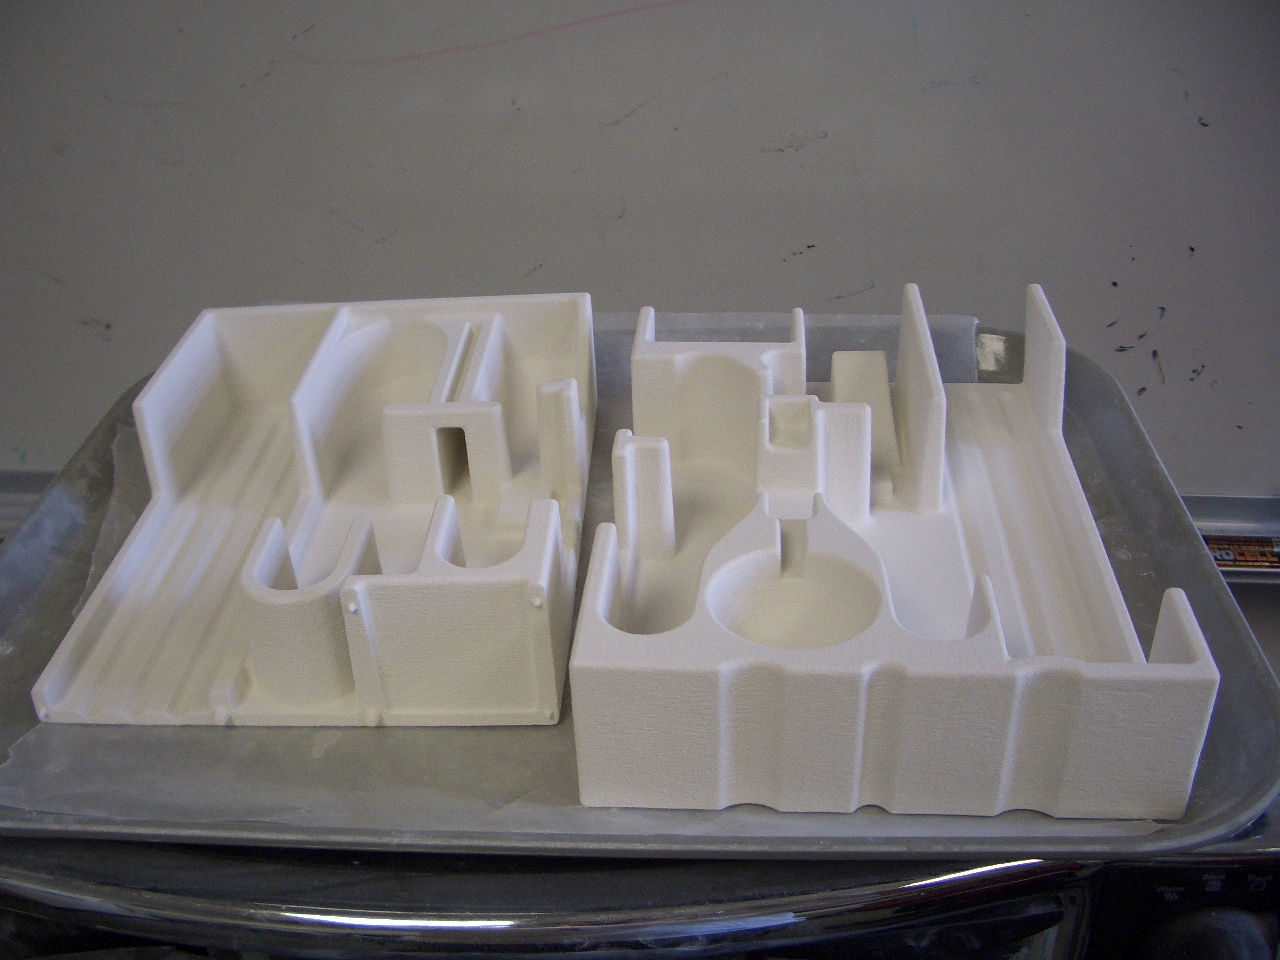
The Result
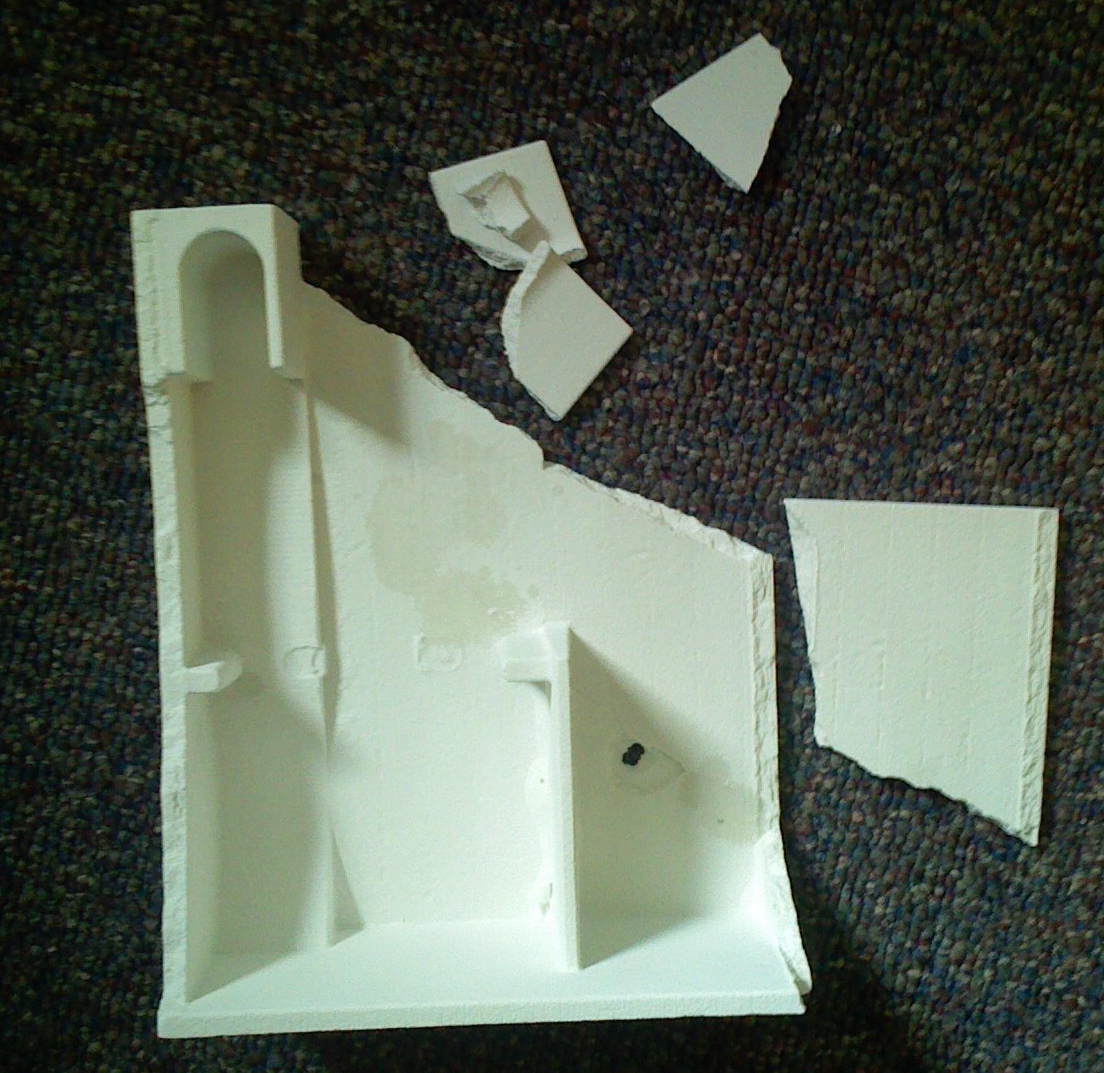
Lots of pieces. I kept a few. I tried to pull the first half from the printer after it had set for 90 minutes. Too soon.
The round supports for the back of the handles were quite stable; the narrow posts, not so much. The featureless, thick base cracked across the diagonal. A small hole punched through when I set it on top of a fragment in the depowdering station.
Lessons
- Thick (1/4 inch) walls and base are heavier than they are strong when coming out of the printer.
- Shell, then fillet. "Shell" tells the software to remove all unnecessary material up to a specified thickness of another surface: all the features, less weight. "Fillet" tells the software to round the corners, almost like sanding wood after using a saw. The complexity of the filleted shape seems to frustrate the shell operation. Move the shell down the order of extrude and cut operations to find the feature that doesn't shell.
- Leave the part in the printer overnight.
- Have an extraction plan that doesn't put stress on the part.
- Clean out the depowdering station so that the part doesn't rest on clumps of another part.
- Use the vacuum to coarsely remove powder while in the printer.
- A mechanical engineer
Revision 2
Another Draft
Back to the drawing board. Fillet. Narrow. Lower the walls. Leave it in all weekend. Insert some wax paper beneath the part so that it can be slid out from the build box. Clean everything.
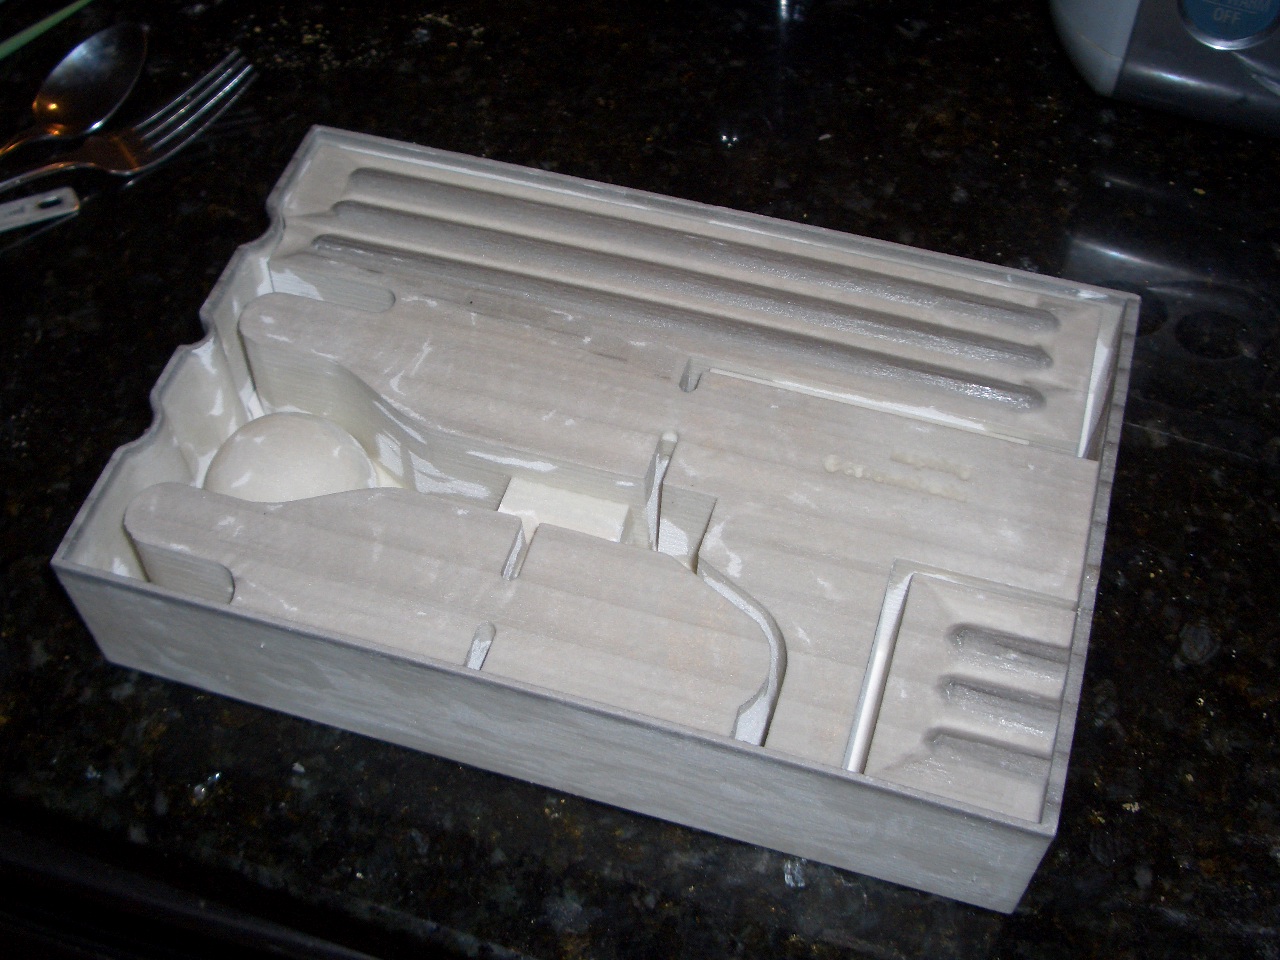
The Underside
The shell had a nice effect. The non-uniform color on the bottom is from the extra cyanoacrylate absorbing in different parts differently. The black / gray on the very lowest layers is there because I had to replace the inkjet cartridge at the heart of the Z-Printer; most of the ink is ejected from the cartridge, but not all, before being refilled with binder.
The First Flaw
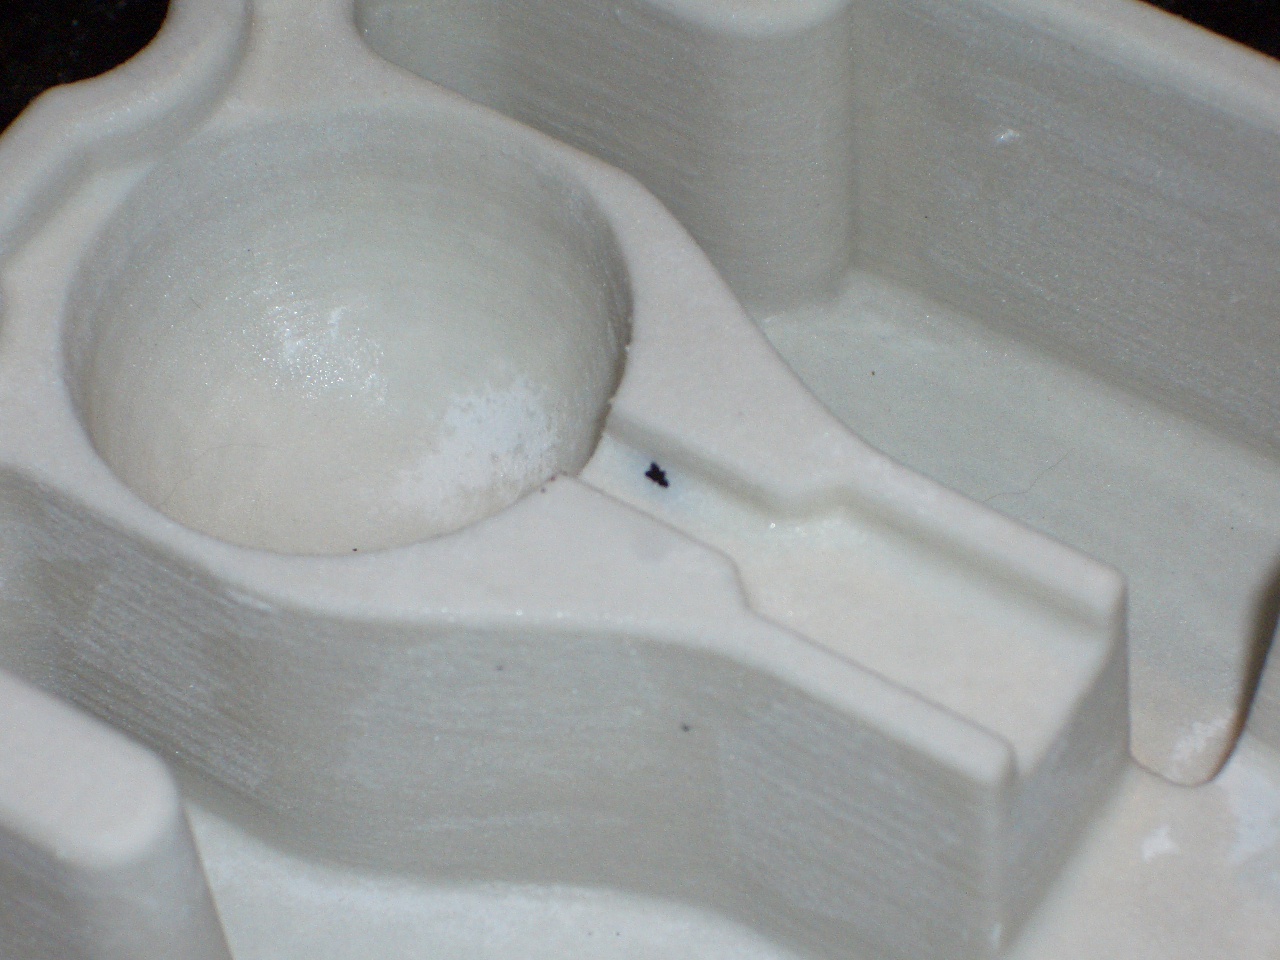
The printed result had a little hole, where somewhere in the conversion through the software, a layer too thin was the result. You can see it just to the right of the spherical dip.
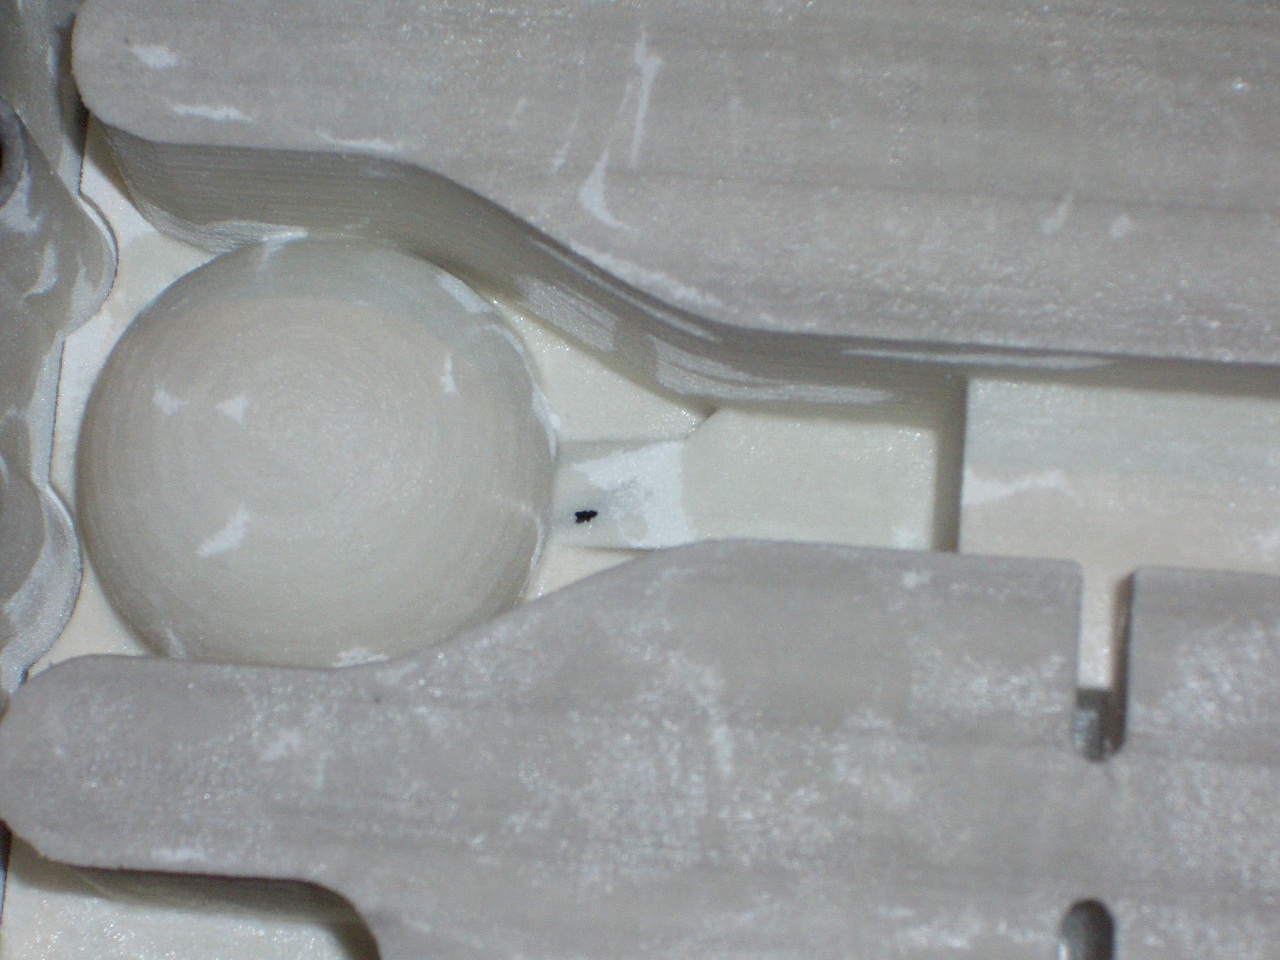
Zoomed on the underside, it's a bit clearer what happened; the thickness wasn't there.
But what's one minor flaw? A paper clip, duct tape,

Minor Imperfections
The cyanoacrylate has to be applied only when the part is completely de-powdered: the instructions say so. I had little idea what "completely" meant. When trying to paint the cyanoacrylate on for even coverage, a little powder stuck to the brush making it stiff, and clumped onto the side walls making zits.
The side walls swelled as the extra cyanoacrylate infused; we placed it in a sort of clamp to keep it from swelling too far.

Damn: Nothing Fits
Only the (single) measuring spoon fits. The fork handle cavity is too narrow, the chopsticks fit, but tightly, and the spoon handle is too short for the bent spoon handles.
Lessons
- Print in 2D first. Errors can be caught and optimizations found.
- You can't paint cyanoacrylate onto plaster; the brush picks up the plaster and becomes stiff quickly.
- Make sure the needle is securely fastened to the air compressor tool before testing the flow of air against your hand.
Revision 3
A draft
Behold. I lowered more walls and added a cavity for another measuring spoon between the salad forks and big spoons. I raised the cavity for the measuring spoon handles. I angled the spoon and fork handles outward to increase the space for the handles. I lengthened the compartments for chopsticks and knives. I even added alignment tabs for joining the two parts.
The new design is magnificent.

2-D Testing
The silverware fit, at least in 2-D. (My duplexer put the other half on the other side.)
I printed using 100% scale, which required "printing" to PDF using Oversize A2 paper. I then split both halves onto 8.5x11 letter using pdfpages. pdflatex multipage.tex producesmultipage.pdf. Apparently, you could buy the Acrobat software to do the same. The multipage.tex file I link is my own, you can adjust the coordinates it extracts from the page, just remember, 72 points per inch, so maintain the dimensions.
Z Printing
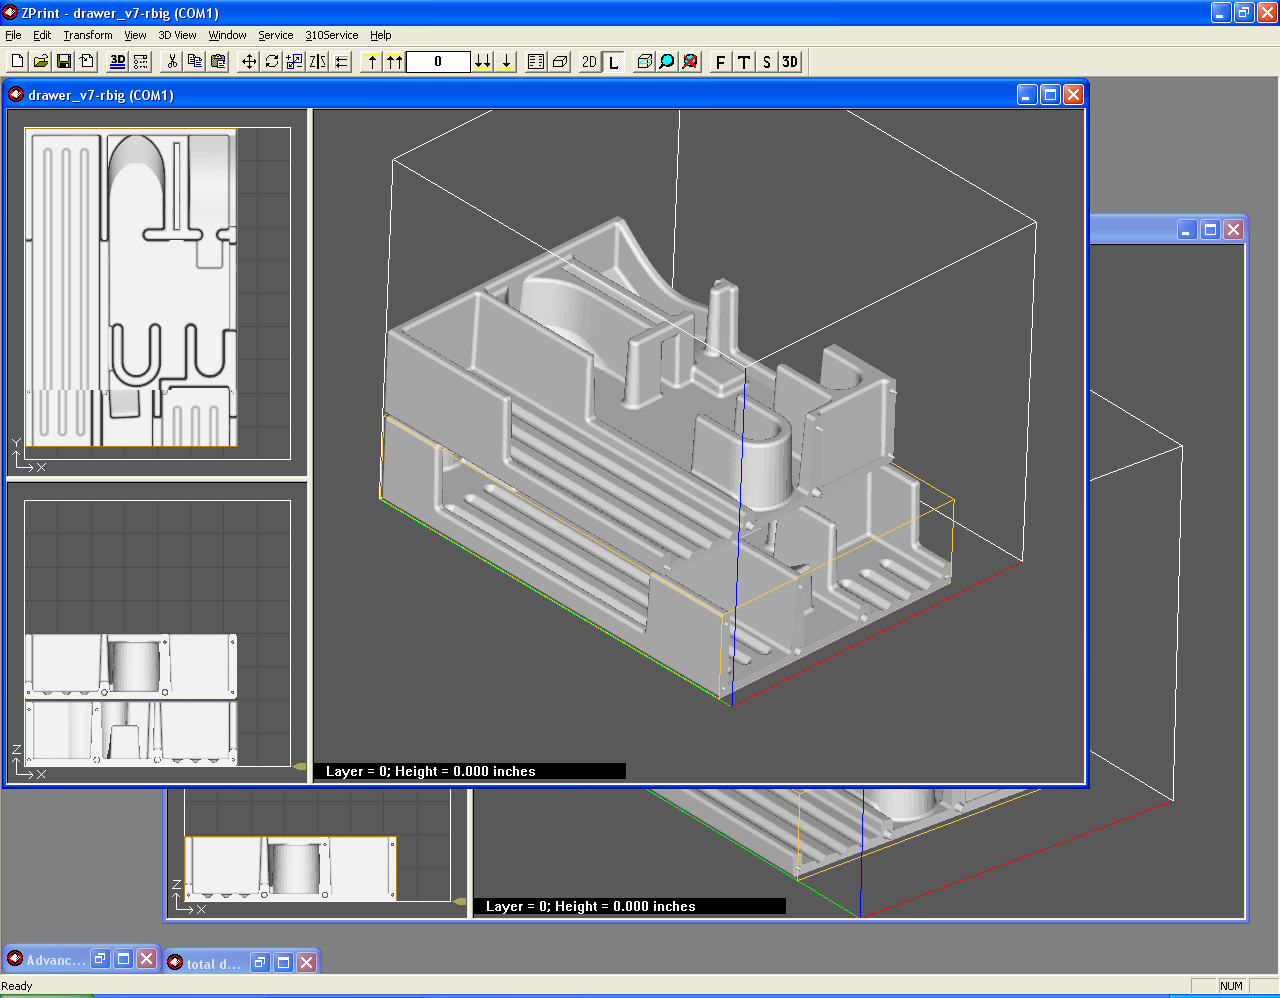
In the ZPrint application, I stacked the two halves to be printed at the same time, and rotated one to make it a bit easier to sweep the extra powder off. It complained of "missing normals," and I worried I would end up with another hole and funny triangles.
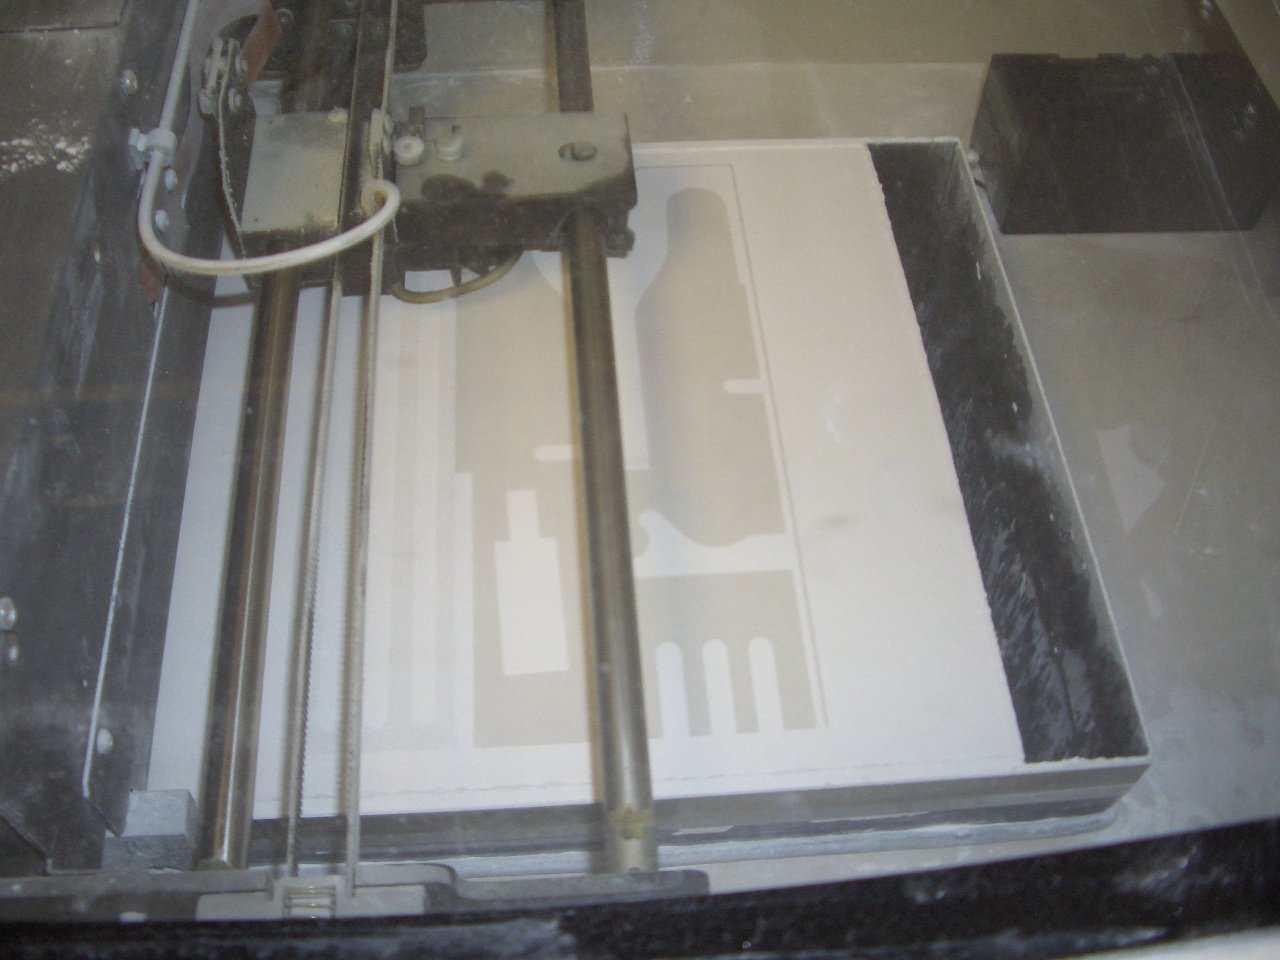
You can see the floor of the tray is being printed here. The black cavity on the right is where the extra powder goes as the printer sweeps powder from the feed bin (off the frame to the left) across the build bin.
Extraction

The next morning, I lowered the feed bin (unused powder) and slightly raised the build bin (where the part is, encased in extra powder). After a while sweeping unused powder off the tray and across to the feed bin, this is what the top half looks like: still covered in powder, but the shape is there. With a vacuum, most of this can be cleared off, but I wanted to start baking this half quickly while depowdering the other.

The trusty toaster oven. 60 degrees Celsius. Two hours. Each half.
Both halves, cleaned and baked. I think they look nice. The layers are visible.
Resin Infused
Sorry, no pictures of me painting on epoxy resin. I was busy.
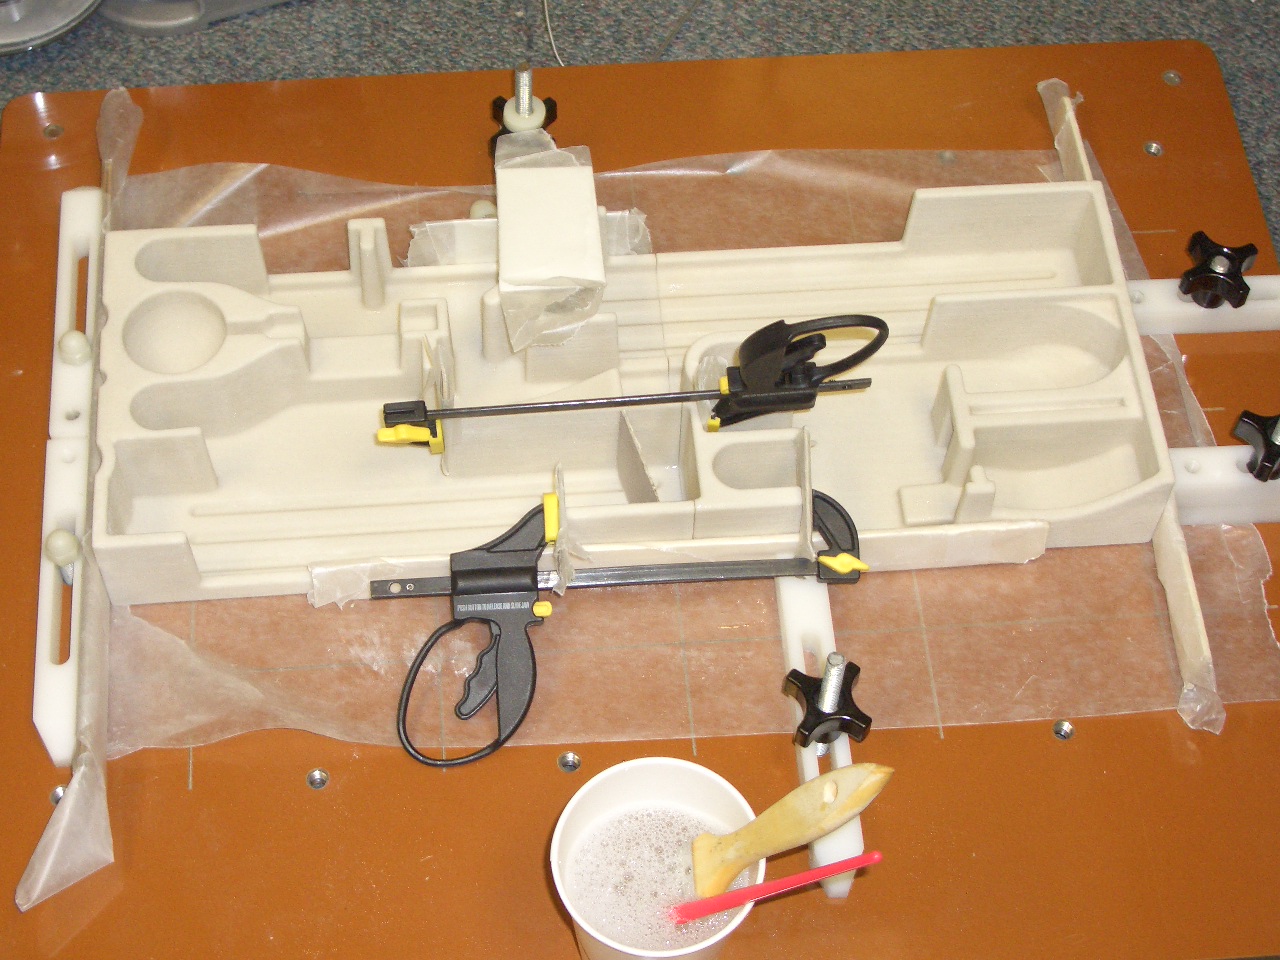
With epoxy resin painted into both halves, and more doused into the seam between them, they're now on the clamping table. At both ends are (paint) stirring sticks wrapped in wax paper. A small piece of cardboard holds the side walls of the chopsticks bin apart: a small crack formed as I depowdered it and bent the wall. With the material wet with resin, it can be reformed.
At the bottom are the (cheap) paint brushes used for resin soaking in soapy water... it seems to work for the small cheap brush, not for the large cheap brush.
A Perfect Box

Lessons
- When depowdering with a vacuum or with the air compressor, habitually pull the tool back toward you before moving it. You won't knock a piece of the part you're not looking at.
- 100 grams of resin plus 34 grams of hardener was sufficient for this 5 billion pixel part. Smaller parts should be able to use much less. (Actually, I learned that lesson working on a smaller part.) That much resin starts to gel before being completely applied with a 1 inch brush, so it may be an upper limit on the amount that should be made at a time.
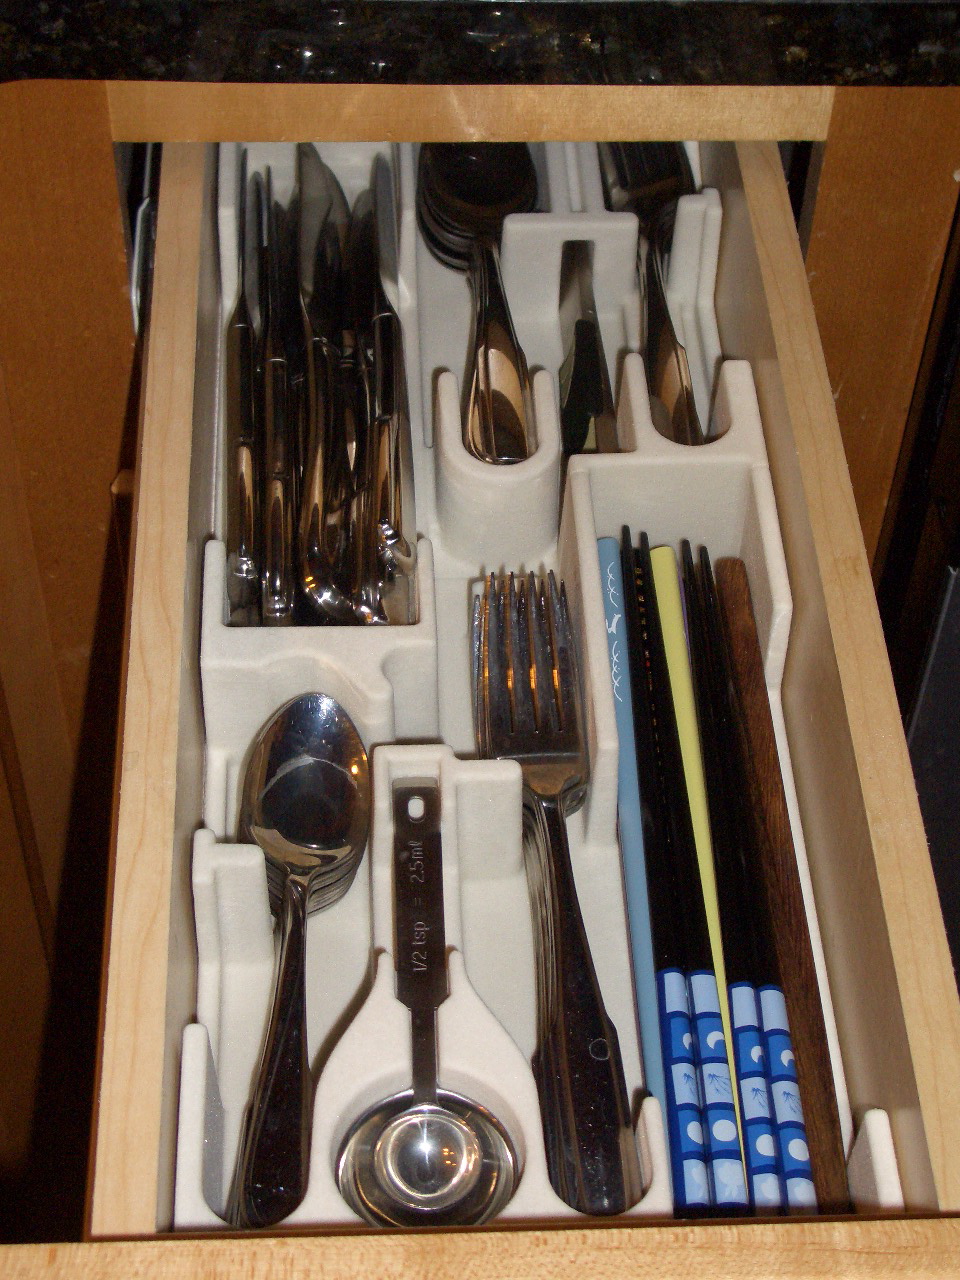
In Action
More Silverware Tray Links
- SolidWorks data file -- critique and duplicate.
- STL for the left (smaller) half -- free STL viewers are available.
- STL for the right (larger) half
External Links
- Hyunyoung's Tutorial describes using the printer in more detail, with more pictures and more description of the care and feeding of the printer.
- Francois's Rapid Prototyping class for undergraduates. Students use this and other prototyping tools in the lab.