
Image Manipulations
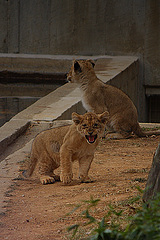
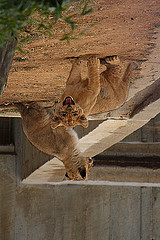
Lions and Squirrels and Choppers, um what?
(This photo was actually manipulated with GIMP, not with this project)
Objective
To practice designing an implementing two-dimensional algorithms, while reading and understanding JavaDoc descriptions of libraries to be able to use the appropriate methods, and to reinforce all of the techniques you've been learning so far within a realistic context. The skills and concepts you explore in the methods you will design and implement represent some of the same ones used to build image editing software like GIMP or Microsoft Paint or Adobe Photoshop.
Overview
This project will involve manipulation of photographs. We have provided the images, below, for you to use with your project, but the project will work with just about any images. The following three image files are included with the project. It is a good idea to test on all four.
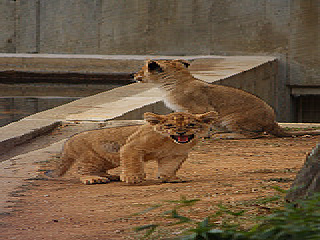
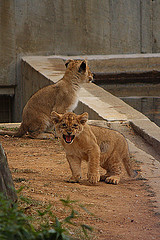
| Aslan.jpg |  |
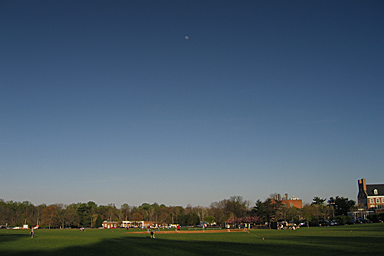
| Marine.jpg | 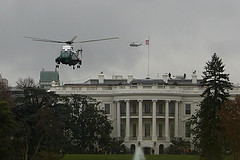 |
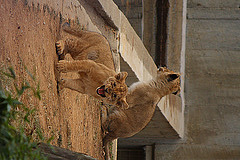
| Squirrel.jpg | 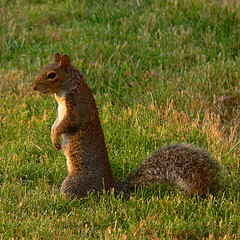 |
| Moonrise.jpg | 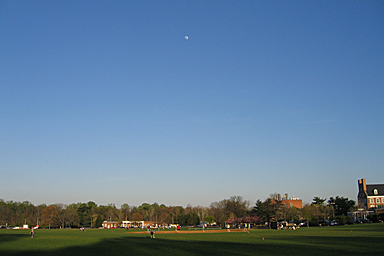 |
Digital Images and Pixels
A digital photograph is made up of a rectangular grid of tiny spots of color, called "pixels". There are many different schemes for how the color in a pixel could be determined -- for this project we will use the most common one (RGB). The color of each pixel in our photos will be determined by its level of three "primary" colors: Red, Green, and Blue. By mixing various amounts of red, green and blue in a pixel, you can create what appears to the human eye as any of a wide range of colors. For each pixel, the level of each of the three primary colors (red, green, and blue) can be anywhere in the range of 0 to 255. Below is a table that illustrates how mixing various levels of Red Green and Blue results in different colors:
| Red | Green | Blue | Resulting Color |
| 153 | 102 | 255 | |
| 89 | 183 | 105 | |
| 214 | 73 | 214 | |
| 255 | 255 | 111 | |
| 0 | 0 | 0 | |
| 255 | 255 | 255 |
JavaDoc
JavaDoc is a tool that Java programmers use to create
automatically-generated documentation for their projects.
This sort of documentation (for example) has been generated for all of
the standard Java class Libraries and is available online.
We have created documentation using JavaDoc for the cmsc131PhotoLibrary
that you will be using for this project.
Take a look:
cmsc131PhotoLibrary API
Documentation.
There will be some information about Java in the JavaDoc that we have
not yet gotten to, but
please don't worry about that -- by the end of the course we will have
seen those things as well.
You need to read and become familiar with the JavaDoc for the Photograph
and Pixel classes, found in the link above.
Reading through the documentation
for some library classes you've never seen before is a common first step
on many new projects in practice. Being familiar with the methods, etc.
allows you to make connections to it as you are thinking about the design
of the code you will be writing.
The Launcher
We are providing a Launcher in a class called "Launcher.java", located in the package called "p4_student". (In Eclipse, click on the "p4_student" package to see what is inside.) The driver contains a main method that you should run to start it up on your machine to test locally.
When you run the main method in the driver, you will see this dialog box:
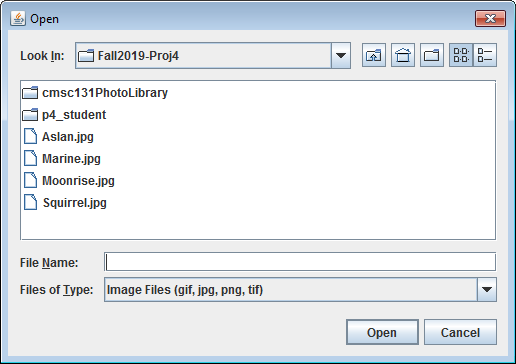
Select a photo that you would like to edit, and then click the "Open" button.
After selecting a photo, you will see your photo presented in a dialog box like this:
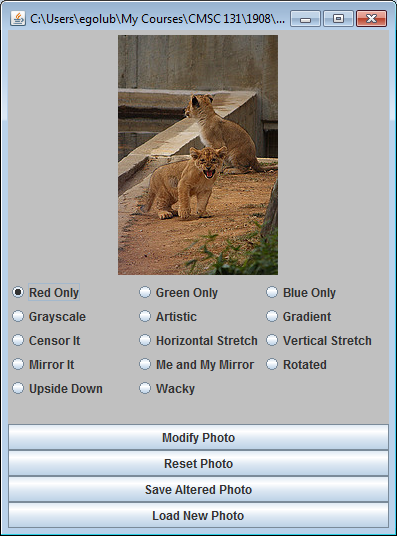
If you select one of the twelve "radio buttons" and then click "Modify Photo", you will see the photo displayed again after the selected "effect" has been applied. For example, if you select the "Upside Down" radio button and click "Modify Photo" for the picture above, you will see this:

You can continue to apply effects to the image by choosing one of the various options and selecting "Modify Photo". If at any time you want to start over with a new unaltered photo, just click the "Load New Photo" button, and you will go back to the original dialog box that asks you to enter the location of a photo.
You can also click "Save Altered Photo" to save the image as it currently appears in the application. Be careful not to overwrite the existed sample images of course.
PhotoTools Class
This is where you come in. None of the editing effects will work until you design and implement them! You must design and implement (and test) nine static methods of the PhotoTools class that are just placeholders when you check out the starter files. This class is located in the "p4_student" package; in Eclipse, click the p4_student package to access the files inside.
Below is a description of all of the static methods that you must implement in the PhotoTools class. You should implement these methods one at a time and run the Launcher to test them out one-by-one as you write them!
For each method described below, you will see a screenshot that shows the resulting image when the effect is applied to the original "Aslan.jpg" photo. Your results must look exactly like those pictured below. Any slight variation will cause you to fail individual public and/or release tests...
public
static Photograph copy(Photograph
photo) --
This method is provided to you as an example. You should
read this description and then read through and make sure you understand
the provided code. It will return a new Photograph that is an exact copy
of the parameter.
Note that it instantiates a blank Photograph that is the same size as the
parameter and then copies all of the pixels from the parameter into that
new Photograph.
Also notice how the nested loops are utilized. Trace through it by hand
at least a little to make sure you are confident with what it is doing and
how. Nested loops will once again play an important role in this project,
and some of the later manipulations might even have nested loops within
other nested loops!
Note: It does not return a reference to the parameter itself; it returns
a reference to a distinct copy of the parameter.
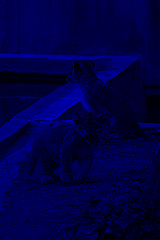
public
static Photograph
isolateColor(Photograph photo, int type) --
This method will return a new Photograph
that is a copy of the parameter, but with only one of the three primary
colors visible; specifically either the red or the blue or the green.
In other words, for each pixel in the new photo, one of the primary colors will
remain unchanged, but the other two will be set to zero.
The second parameter, type, will be used to specify which color will
remain; it will be: 0 for red or 1 for blue or 2 for green.
For example, if the type is 1 (blue), then each pixel in the new photo
will preserve the original blue value,
but will have the red and green values set to 0.
As you design this, think about how you can avoid redundant code.
Note:: As with the other methods, the PhotoSystem is written so that it
invokes this method with the appropriate parameters. You implement the method
as described, getting the type of color isolation via the parameter.
Below is an example where type is 1:
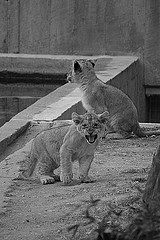
public
static Photograph
makeGrayscale(Photograph photo) --
This method will return a new Photograph that is a grayscale
copy of the parameter.
Here is how to create each pixel in the new photo:
In this project we will use my recipe for gray;
combine 60% of the pixel's red,
20% of the pixel's green,
and 20% of the pixel's blue
and then use that new value to set
all three color channel levels for
the grayscale pixel in the new photo equal to this value.
The way you should create this new gray value integer is:
   grayValue = (int)(pixel.getRed() * 0.6) +
               (int)(pixel.getGreen() * 0.2) +
               (int)(pixel.getBlue() * 0.2);
For example, if the RGB values for a particular pixel in the original photo
are
<110, 130, 140>
then you would set the RGB values for the corresponding pixel in the new
photo to
<120, 120, 120>
since by the above formula we get 66+26+28 which is 120 for the grayValue.
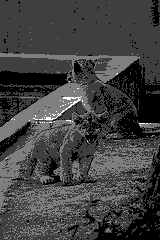
public
static
Photograph makeArtistic(Photograph photo) --
This method will return a new Photograph
that is also a sort of grayscale, but using a different set of rules.
In this case, there are only going to be 4 levels of gray used;
(0,0,0) or
(63,63,63) or
(127,127,127) or
(255,255,255).
First, you will add up the red, green, and blue values for a pixel.
Then, depending on the value of that sum, you'll make the pixel
in the corresponding position of the new image the appropriate gray
according to the following ranges:
      0 through 191:(0,0,0)
    192 through 343:(63,63,63)
    344 through 575:(127,127,127)
    576 through 765:(255,255,255)
public
static Photograph censorIt(Photograph
photo) --
This method will return a new Photograph that is meant to
obscure the image and yet still be based on it.
      The rules for censoring a photo are as follows:
          - the new image will have the same dimensions as the original one
          - we will process things in 10x10 sections
          - within each 10x10 section what we will do is:
              - take the average of all the red channels of the
                  pixels in that section of the original and use
                  that as the red channel for all of the pixels in
                  that section in the new image
              - we'll use the same approach for the green and
                  blue channels
          - if a section is not 10x10 (think about the edges)
              then we'll just take the average of the pixels that
              are in those edge sections
Read through those rules carefully. We encourage you to use
paper and pencil/pen to help you
sketch out what these mean and then write the pseudocode for your method
and trace through it (at least partially) for an image that's perhaps
20x30 pixels
in size to think about whether it does what you intended.
public
static Photograph stretched(Photograph
photo, int type) -- This method will return a new Photograph
that is either twice as wide or twice as high as the original. The
parameter type will be either: 0 for a horizontal stretch, or
1 for a vertical stretch. In other words, if type is 0, then
each column of pixels in the original
photo will appear twice in the new one. If type is 1, then
each row in the original photo will appear twice in the new
one. Below is an example where type is 0:
public
static
Photograph mirrorIt(Photograph photo) --
This method will return a new Photograph that is a mirror image
of the original photo.
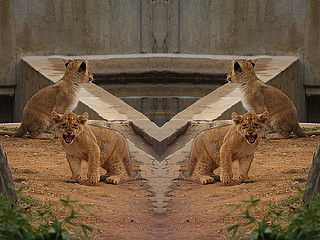
public
static
Photograph makeDoubleWithMirror(Photograph photo) --
This method will return a new Photograph that is twice
as wide as the original photos and that contains a mirror image of the
original photo on the left and the original photo on the right.
public
static
Photograph gradientFilter(Photograph photo) --
This method will return a new Photograph
in which the image is made darker in a gradient manner going top to bottom.
The effect is that of having a gradient filter in front of the camera lens
where the darkening gradually goes from around 50% to 0% (ie: not any darker).
Mathematically, this means creating the following floaating point "darkness factor"
based on the current y-coordinate where the darknessFactor is 50% + y/height/2.
You will need to think about how to turns this into Java code using floating
point math, etc. correctly so that this darkness factor is a double-precicision
floating point number.
Then, to apply this to a pixel in a position with tha y value,
for each of its three color channels you'll need to make it darker by that factor.
using the following type of formula that is making the blue darker by the appropriate
amount:
(int)(darkness*photo.getPixel(x,y).getBlue()).
For this to work, you MUST create a double-precision floating point number and use
that to multiply against each color channel to get another double-precision floating point number
which you then cast to an int.
 ,
,
public
static Photograph rotated(Photograph
photo) -- This method will return a new Photograph
that is the same as the original, but turned 90 degrees clockwise.
public
static
Photograph upsideDown(Photograph photo) --
This method will return a new Photograph that is an exact copy of the parameter,
but rotated 180 degrees.
The real challenge here is to do it using only a single line of code
in the body of this method.
Don't just start coding; think about how to accomplish this!
public static Photograph wacky(Photograph photo) -- This method will return a new Photograph that looks however you might want it to. This option is here as a place for you to explore and try different things and then be able to save the result to show others.
Requirements
Project Submission
Submit your project from Eclipse by right-clicking the project folder and selecting "submit project". You may submit as many times as you want -- we only grade the submission that scores the highest on the automated tests. After you have submitted your project, you should visit the submit server. There you can obtain limited feedback about how well your project is performing. The number of times you can run our tests on your project (before the due date) is limited. The earlier you begin working on the project, the more opportunities you will have to see how your project performs on our tests before the due date!
Grading
For this project, we have written one large JUnit test for each of the methods
you will be implementing.
You will want to test your own code well and also start promptly so that you
have several days of release tokens to use if needed on the release testing
of the later tasks.
85% of your grade will come from automated tests.
The first public tests covers copy, which we wrote for you, and which
is worth 0 points towards grading. We have put this into the tests in
case you want to explore different ideas on how to copy to practice
before moving on to the project tasks.
The next three public tests cover artistic, grayscale, and color isolations.
The release tests cover mirroring, the mirror combo, censoring, the stretches,
the gradient filter,
as well as the two challenge problems (note that the challenge problems are
worth zero points in terms of the project's grading, and the submit server
can't test whether you used only a single line of code for Challenge #2, just
whether the output is correct).
Recall that you have three release tokens, and that after using one it will
take 24 hours to regenerate, so you are encouraged to
(a) start promptly,
(b) test locally on all provided example images,
and (c) release test as you go once you think you have a working feature.
5% of your grade will come from the ELMS submission.
10% of your grade will come from us inspecting your code for things such as
good style (variable names, indenting, etc), avoiding redundant code, as well
as good commenting on this project.