Creating a .jar file
You normally should submit all projects through CVS, but if you are having
difficulty with CVS, you may submit a jar file containing your source code using
the Submit Server. A .jar file is a single file that contains other files
(similar to .zip or .tar files). In order to create a .jar file containing the
source code for your project, please follow these steps:
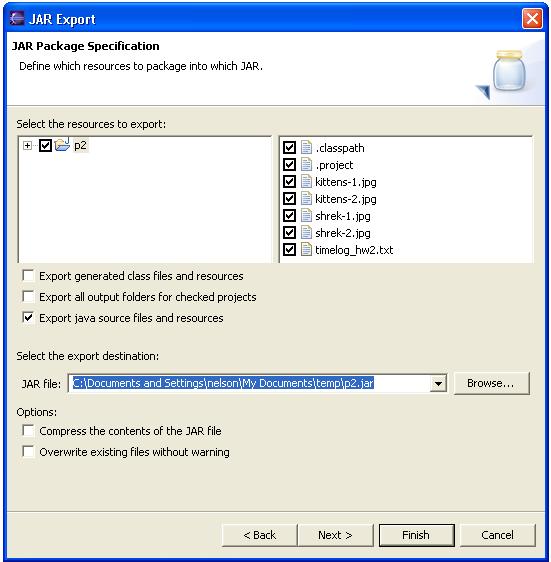
- In the Dr. Java perspective, select your project in the "Package
Explorer" (upper left pane).
- Select File->Export from the pull-down menu.
- Select "JAR file" from the list of options and press the Next button.
- Examine the checked items to make sure the files you want included in
the .jar file are correct. You should almost never have to change
anything here, but you can check this to have confidence that you are
including what you want. Note that you will have to click on the small
"plus" sign just to the left of your project name to see the sub-directories
that will be included.
- Make sure the box is unchecked next to
"Export generated class files and resources".
- Make sure the box is checked next to
"Export java source files and resources". If by mistake you do
not check this box you will create a jar file with files we cannot use.
This is one of the most common errors we see when students are trying to
provide a jar file with their code.
- In the text box near the bottom where it says "JAR file", enter the full
path to a .jar file that you want to create (e.g., "C:\Documents and
Settings\nelson\My Documents\temp\p2.jar")
- Click the Finish button
The following picture shows a screenshot of the JAR Export dialog just before
the Finish button has been pressed:
Pressing the Finish button will create the .jar file.
Web Accessibility