|
Adding Special Effects This tutorial will show you
how to use activities to control animation and other
scheduled behaviors. It will cover how to extend
existing activities, how to use PNode's animation methods,
how to set an activity's delegate, and how to schedule activities to occur
in a specific sequence. |
|
Download the complete code sample in
Java or
C#.
1.
Setup
We need to create a window with a Piccolo canvas, so that
we can add the interface components to the canvas.
- First you will need to reference the appropriate
packages/namespaces. Add the following lines to the top of
your code file:
Java |
C#
import edu.umd.cs.piccolo.*;
import edu.umd.cs.piccolo.activities.*;
import edu.umd.cs.piccolo.nodes.*;
import edu.umd.cs.piccolox.*;
Web Accessibility
using UMD.HCIL.Piccolo;
using UMD.HCIL.Piccolo.Activities;
using UMD.HCIL.Piccolo.Nodes;
using UMD.HCIL.Piccolo.Util;
using UMD.HCIL.PiccoloX;
Web Accessibility
The first line adds the base Piccolo types, such as PNode.
The second line includes the activity classes. The third
line includes the default node types that Piccolo
provides, all of which extend PNode. The
fourth line (for the C# sample) includes several utility classes. And the last
line includes various "extras," such as PForm in .NET and
PFrame in Java, which will be used below.
- Next we will extend the
PForm class in .NET or the PFrame
class in Java. This is a convenience class that adds a PCanvas
to a window. When you extend this class, you should NOT add your Piccolo code
to the constructor. Instead, you should
override the
initialize method and add all of your Piccolo code
there. See the
FAQ for more details.
Java |
C#
public class EffectsFrame extends PFrame {
	public void initialize() {
		//Add Piccolo code here.
	}
}
Web Accessibility
public class EffectsForm : PForm {
	public override void Initialize() {
		//Add Piccolo code here.
	}
}
Web Accessibility
2.
Create the Target for our Activities
An activity defines a time-dependent behavior. You
can perform any operation you want each time the activity steps.
Typically, you will modify a node in some way. For example, to
animate a node, you would move the node each time the activity
steps. Here we will define a new node that will be the target
of our activities.
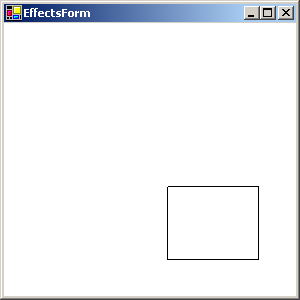
We will create a new node and position it at the bottom right
corner of the screen. Add the following lines of code to
the initialize method.
Java |
C#
// Create a new node that we will apply different activities to, and
// place that node at location 200, 200.
final PNode aNode = PPath.createRectangle(0, 0, 100, 80);
PLayer layer = getCanvas().getLayer();
layer.addChild(aNode);
aNode.setOffset(200, 200);
Web Accessibility
// Create a new node that we will apply different activities to, and
// place that node at location 200, 200.
aNode = PPath.CreateRectangle(0, 0, 100, 80);
PLayer layer = Canvas.Layer;
layer.AddChild(aNode);
aNode.SetOffset(Canvas.Width-aNode.Width, Canvas.Height-aNode.Height);
Web Accessibility
3. Extend PActivity
Here we will explore how to create a new activity to act
on our node by extending one of the activity
classes.
- First, we will design a new flash activity that will toggle
our node's color between red and green continuously without terminating. To do this, we will extend
PActivity, the base
activity type. Add the following internal class beneath
the initialize method.
Java |
C#
PActivity flash = new PActivity(-1, 500, currentTime + 5000) {
	boolean fRed = true;

	protected void activityStep(long elapsedTime) {
		super.activityStep(elapsedTime);

		// Toggle the target node's brush color between red and green
		// each time the activity steps.
		if (fRed) {
			aNode.setPaint(Color.red);
		} else {
			aNode.setPaint(Color.green);
		}

		fRed = !fRed;
	}
};
Web Accessibility
class Flash : PActivity {
	bool fRed;
	PNode target;

	public Flash(PNode target, long aDuration, long aStepInterval,
		long aStartTime) : base(aDuration, aStepInterval, aStartTime) {

		this.target = target;
	}

	protected override void OnActivityStep(long elapsedTime) {
		base.OnActivityStep (elapsedTime);

		// Toggle the target node's brush color between red and green
		// each time the activity steps.
		if (fRed) {
			target.Brush = Brushes.Red;
		} else {
			target.Brush = Brushes.Green;
		}

		fRed = !fRed;
	}
}
Web Accessibility
PActivity is the top-level activity class that all
activities descend from. It will run for a
predetermined time, specified by its duration, and it will step a number of times, specified by its step
interval. PActivity provides three methods that you can
override to be notified when an activity starts, each time it
steps, and when it finishes. In Piccolo.NET these methods
are OnActivityStarted(), OnActivityStep(), and OnActivityFinished().
In Piccolo.Java, they are activityStarted(), activityStep(),
and
activityFinished(). By default, nothing will happen when
a PActivity steps. Typically, you will extend PActivity and
override activityStep() or OnActivityStep() so that you can perform
some operation for each step of the activity.In the above
example, we create a new constructor that will take in the node
whose fill color we wish to flash. The constructor also
takes in the duration, step interval and start time for the
activity. We pass these millisecond values to the base
activity.
We also override the activityStep() method in java and
the OnActiviytStep() method in .NET. For each step of the
interval we toggle our target node's color between red and
green.
- Next, we will create a new flash activity and schedule it
with the root. Add the following lines of code to the
initialize method.
Java |
C#
// Store the current time in milliseconds for use below.
long currentTime = System.currentTimeMillis();

// Create a new custom "flash" activity. This activity will start running in
// five seconds, and while it runs it will flash aNode's paint between
// red and green every half second.
PActivity flash = new PActivity(-1, 500, currentTime + 5000)
	{ /* see code above */ });

// Schedule the activity.
getCanvas().getRoot().addActivity(flash);
Web Accessibility
// Store the current time in milliseconds for use below.
long currentTime = PUtil.CurrentTimeMillis;

// Create a new custom "flash" activity. This activity will start running in
// five seconds, and while it runs it will flash aNode's brush color between
// red and green every half second.
PActivity flash = new Flash(aNode, -1, 500, currentTime + 5000);

// Schedule the activity.
Canvas.Root.AddActivity(flash);
Web Accessibility
First, we store the current time in milliseconds, so that we can
use it with our activities below.Next, we create a flash
activity, passing it the node we created above as the target.
We specify a duration of -1, which will cause the activity to
run continuously, and a step interval of 500ms. Finally,
we set the start time to be currentTime + 5000ms, indicating
that we want our activity to start stepping five seconds from
now.
Finally, we schedule the activity with the root. An
activity will not run until it has been scheduled to do so.
Note, for clarity, this example uses a full static class to
define the Flash activity. But, Piccolo does provide a few
shortcuts. In Piccolo.Java, you could use an anonymous
inner class to inline the Flash activity. The .NET
Framework does not support anonymous inner classes.
However, with Piccolo.NET, you could still instantiate a
PActivity and set its ActivityStepped delegate, rather than
creating a new class. You would then move the code in the
OnActivityStep() method to your new delegate method. For an
example of how to define a flash activity in this way, see the
Activities
section of the patterns document. Activity delegates will
be described in detail later.
4. Use PNode's Animation
Methods
Now, let's add some animation. It turns out we
don't have to create any activities to do this. PNode
provides several convenience methods that will animate a
node in various ways. Internally, these methods will
of course create activities. Note, if you want to
create animation activities from scratch, you should extend
PInterpolatingActivity.
- We will use
PNode's AnimateToPositionScaleRotation() method to
move the node across the screen, rotating it and scaling it
along the way. Add the following lines of code to the initialize method.
Java |
C#
// Create three activities that animate the node's position. Since our node
// already descends from the root node the animate methods will automatically
// schedule these activities for us.
PActivity a1 = aNode.animateToPositionScaleRotation(0, 0, 0.5, 0, 5000);
PActivity a2 = aNode.animateToPositionScaleRotation(100, 0, 1.5,
	Math.toRadians(110), 5000);
PActivity a3 = aNode.animateToPositionScaleRotation(200, 100, 1, 0, 5000);
Web Accessibility
// Create three activities that animate the node's position. Since our node
// already descends from the root node the animate methods will automatically
// schedule these activities for us.
PActivity a1 = aNode.AnimateToPositionScaleRotation(0f, 0f, 0.5f, 0f, 5000);
PActivity a2 = aNode.AnimateToPositionScaleRotation(100f, 0f, 1.5f, 110f, 5000);
PActivity a3 = aNode.AnimateToPositionScaleRotation(200f, 100f, 1f, 0f, 5000);
Web Accessibility
The AnimateToPositionScaleRotation() method will animate a node
from its current transform to a new transform specified by the
given position, scale and rotation. The first two
arguments to this method specify the new position. The
third argument specifies the new scale. The fourth
argument specifies the new rotation. And, the final
argument specifies the duration of the animation. This
method will also return the newly scheduled activity.First, we
will animate the node to the position (0, 0) and scale it down
to .5. We will not rotate the node at all. This
animation will occur over a period of five seconds.
Next, we will animate the node to the position (100,
0), scale it up to 1.5, and rotate it 110 degrees. This
animation will occur over a period of five seconds.
Finally, we will animate the node to the position (200, 100),
scale it back down to its natural size, and rotate it back to 0
degrees. This animation will occur over a period of five
seconds.
- Now, we need to specify the order in which these animations
will occur. Add the following lines of code to the
initialize method.
Java |
C#
// The animate activities will start immediately (in the next call to
// PRoot.processInputs) by default. Here we set their start times (in PRoot
// global time) so that they start when the previous one has finished.
a1.setStartTime(currentTime);
a2.startAfter(a1);
a3.startAfter(a2);
Web Accessibility
// The animate activities will start immediately (in the next call to
// PRoot.processInputs) by default. Here we set their start times (in PRoot
// global time) so that they start when the previous one has finished.
a1.StartTime = currentTime;
a2.StartAfter(a1);
a3.StartAfter(a2);
Web Accessibility
PNode's animation methods will always schedule the activities they
create to start running immediately. We don't want these
activities to run at the same time, since they would conflict
with each other. So, we need to specify when they should
occur.We set the first activity's start time to be currentTime. We use PActivity's StartAfter() method to
specify that the second activity should start after the first
one and that the third activity should start after the second
one. We could have also achieved the same effect by
setting the start time on all three activities. Since our
flash activity starts five seconds from currentTime, it
should begin as soon as the first activity ends.
5. Set the Activity Delegate
Sometimes you will want to be notified when an Activity
goes through different states, such as starting and
stopping. Of course, you could extend PActivity and
override the appropriate methods to be notified of these
state changes, as we did with the flash activity above.
But, what if you want to keep track of an activity that has
already been defined elsewhere. For example what if
you want something to happen at the end of an activity that
was created using one of PNode's animate methods. In
this situation you should use the activity delegate.
Below we will use the activity delegate to get notified when
an activity starts and stops.
- We will print out a message when our first animation activity starts and stops.
Add the following lines of code to the project. The java
snippet should be added directly to the
initialize
method. The .NET snippet should be added beneath
initialize.
Java |
C#
a1.setDelegate(new PActivity.PActivityDelegate() {
	public void activityStarted(PActivity activity) {
		System.out.println("a1 started");
	}
	public void activityStepped(PActivity activity) {}
	public void activityFinished(PActivity activity) {
		System.out.println("a1 finished");
	}
});
Web Accessibility
// This method will be called when a1 starts.
public void a1ActivityStarted(PActivity activity) {
	System.Console.WriteLine("a1 started");
}

// This method will be called when a1 finishes.
public void a1ActivityFinished(PActivity activity) {
	System.Console.WriteLine("a1 finished");
}
Web Accessibility
The Java version of this snippet implements the
PActivityDelegate interface, which includes three methods (activityStarted(),
activityStepped() and activityFinished()).
The activityStepped() method is simply left empty,
since we are not interested in doing anything when the activity steps.The C# version
could have been written the same way.
But, since .NET has language support for delegates, Piccolo.NET
provides a separate delegate for each of these methods, allowing
you to set them individually. That way you don't
have to implement the whole interface if you don't need to.
In this case, we provide delegate methods that will get called
when the activity starts and stops.
In both versions, when the activity starts, we print out a message that
says "a1 started" and when it ends, we print a message that says
"a1 finished".
- Now that we have implemented the activity delegate methods
we need to register them with the activity. Add the
following lines of code to the
initialize method.
Java |
C#
// We can use the delegate methods to learn about and act on the different
// states an activity goes through, such as when it starts and stops.

The Java version defines and attaches the delegate using an anonymous class.
See previous code sample.
Web Accessibility
// We can use the delegate methods to learn about and act on the different
// states an activity goes through, such as when it starts and stops.
a1.ActivityStarted = new ActivityStartedDelegate(a1ActivityStarted);
a1.ActivityFinished = new ActivityFinishedDelegate(a1ActivityFinished);
Web Accessibility
In the Java version, we set the activity delegate to our
implementation of PActivityDelegate. In the C# version, we
set each of the delegate methods individually.
|