|
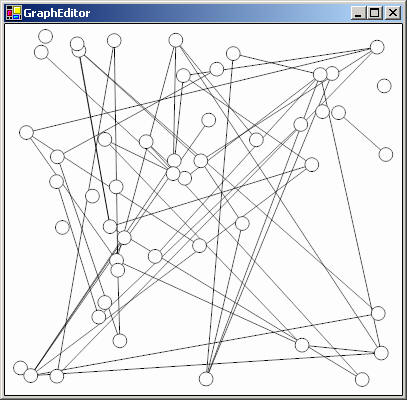
Graph Editor This tutorial will
illustrate how you
might build a graph editor interface using Piccolo.
Moving the mouse over a node will highlight that node.
And, dragging a node will move that node around, keeping
the edges connected. |
|
Download the complete code sample in
Java or
C#.
Play with the interface.
Overall Architecture
In this example, we will use the PPath node provided by
Piccolo for both our nodes and edges. Rather than creating our
own data structure to keep track of the connections, we will use
PNode's Tag property in .NET and its getAttribute and addAttribute
methods in Java. Both of these mechanisms provide the
ability to attach extra information to a node without subclassing it.
For each node in the graph, we will attach a list of its connected
edges. And for each edge in the graph, we will attach a list
of its connected nodes.
We will then create a reusable GraphEditor
component that extends PCanvas. This component will
add the nodes and edges to the scene-graph. We
will also create an event handler class to drag the
nodes and update the edges. Finally, we will
create a wrapper window called GraphEditorTester and
add our new component to the window.
1.
Create a Graph Canvas
We will make a reusable component that extends PCanvas
and initializes the graph.
We extend PCanvas and add some random nodes
and edges. Add the following class to your
project.
Java |
C#
public class GraphEditor extends PCanvas {
    public GraphEditor(int width, int height) {
        setPreferredSize(new Dimension(width, height));
        int numNodes = 50;
        int numEdges = 50;

        // Initialize, and create a layer for the edges
        // (always underneath the nodes)
        PLayer nodeLayer = getLayer();
        PLayer edgeLayer = new PLayer();
        getRoot().addChild(edgeLayer);
        getCamera().addLayer(0, edgeLayer);
        Random random = new Random();

        // Create some random nodes
        // Each node's attribute set has an
        // ArrayList to store associated edges
        for (int i = 0; i < numNodes; i++) {
            float x = random.nextInt(width);
            float y = random.nextInt(height);
            PPath node = PPath.createEllipse(x, y, 20, 20);
            node.addAttribute("edges", new ArrayList());
            nodeLayer.addChild(node);
        }

        // Create some random edges
        // Each edge's attribute set has an
        // ArrayList to store associated nodes
        for (int i = 0; i < numEdges; i++) {
            int n1 = random.nextInt(numNodes);
            int n2 = random.nextInt(numNodes);

            // Make sure we have two distinct nodes.
            while (n1 == n2) {
                n2 = random.nextInt(numNodes);
            }

            PNode node1 = nodeLayer.getChild(n1);
            PNode node2 = nodeLayer.getChild(n2);
            PPath edge = new PPath();
            ((ArrayList)node1.getAttribute("edges")).add(edge);
            ((ArrayList)node2.getAttribute("edges")).add(edge);
            edge.addAttribute("nodes", new ArrayList());
            ((ArrayList)edge.getAttribute("nodes")).add(node1);
            ((ArrayList)edge.getAttribute("nodes")).add(node2);
            edgeLayer.addChild(edge);
            updateEdge(edge);
        }

        // Create event handler to move nodes and update edges
        nodeLayer.addInputEventListener(...);
    }

    public void updateEdge(PPath edge) {
        // Note that the node's "FullBounds" must be used
        // (instead of just the "Bounds") because the nodes
        // have non-identity transforms which must be included
        // when determining their position.


        PNode node1 = (PNode) ((ArrayList)edge.getAttribute("nodes")).get(0);
        PNode node2 = (PNode) ((ArrayList)edge.getAttribute("nodes")).get(1);
        Point2D start = node1.getFullBoundsReference().getCenter2D();
        Point2D end = node2.getFullBoundsReference().getCenter2D();
        edge.reset();
        edge.moveTo((float)start.getX(), (float)start.getY());
        edge.lineTo((float)end.getX(), (float)end.getY());
    }
}

Web Accessibility
public class GraphEditor : PCanvas {
    public GraphEditor(int width, int height) {
        this.Size = new Size(width, height);
        int numNodes = 50;
        int numEdges = 50;

        // Initialize, and create a layer for the edges
        // (always underneath the nodes)
        PLayer nodeLayer = this.Layer;
        PLayer edgeLayer = new PLayer();
        Root.AddChild(edgeLayer);
        this.Camera.AddLayer(0, edgeLayer);
        Random rnd = new Random();

        // Create some random nodes
        // Each node's Tag has an ArrayList
        // used to store associated edges
        for (int i=0; i<numNodes; i++) {
            float x = (float)(this.ClientSize.Width * rnd.NextDouble());
            float y = (float)(this.ClientSize.Height * rnd.NextDouble());
            PPath path = PPath.CreateEllipse(x, y, 20, 20);
            path.Tag = new ArrayList();
            nodeLayer.AddChild(path);
        }

        // Create some random edges
        // Each edge's Tag has an ArrayList
        // used to store associated nodes
        for (int i=0; i<numEdges; i++) {
            int n1 = rnd.Next(numNodes);
            int n2 = n1;

            // Make sure we have two distinct nodes.
            while (n2 == n1) {
                n2 = rnd.Next(numNodes);
            }

            PNode node1 = nodeLayer[n1];
            PNode node2 = nodeLayer[n2];
            PPath edge = new PPath();
            ((ArrayList)node1.Tag).Add(edge);
            ((ArrayList)node2.Tag).Add(edge);
            edge.Tag = new ArrayList();
            ((ArrayList)edge.Tag).Add(node1);
            ((ArrayList)edge.Tag).Add(node2);
            edgeLayer.AddChild(edge);
            UpdateEdge(edge);
        }

        // Create event handler to move nodes and update edges
        nodeLayer.AddInputEventListener(new NodeDragHandler());
    }

    public static void UpdateEdge(PPath edge) {
        // Note that the node's "FullBounds" must be used
        // (instead of just the "Bounds") because the nodes
        // have non-identity transforms which must be included
        // when determining their position.

        ArrayList nodes = (ArrayList)edge.Tag;
        PNode node1 = (PNode)nodes[0];
        PNode node2 = (PNode)nodes[1];
        PointF start = PUtil.CenterOfRectangle(node1.FullBounds);
        PointF end = PUtil.CenterOfRectangle(node2.FullBounds);
        edge.Reset();
        edge.AddLine(start.X, start.Y, end.X, end.Y);
    }
}
Web Accessibility
First we create some randomly positioned ellipses, for our nodes.
Next, we need to attach a list to each node, to store the connected edges.
Piccolo.NET provides the ability to add an object
reference as a tag whereas Piccolo.Java uses a set of named
attributes instead. In the Java version, we use addAttribute
to attach an ArrayList. In the .NET version, we set each node's Tag property to an
ArrayList.
Next, we create some lines for our edges. Note, we use a separate layer
added underneath the main layer, to insure that the nodes are always
on top. For each edge, we randomly choose two nodes to
connect. We add the edge to each node's list of edges and we add the nodes to the edge's list of
nodes. The UpdateEdge method is called to
position the line's endpoints to the center points of each node.
Finally, we add an event listener, defined below, to make our graph
interactive.
2.
Create a Drag Event Handler
We will create an event listener class to handle
all of the interaction of our application, including
highlighting and dragging nodes.
We extend PDragSequenceEventHandler to create an
event listener that performs some operation during a drag
sequence. Add the following code to your project.
For the Java version, you should add the anonymous event
listener class to the constructor.
Java |
C#
nodeLayer.addInputEventListener(new PDragEventHandler() {
    {
        PInputEventFilter filter = new PInputEventFilter();
        filter.setOrMask(InputEvent.BUTTON1_MASK | InputEvent.BUTTON3_MASK);
        setEventFilter(filter);
    }

    public void mouseEntered(PInputEvent e) {
        super.mouseEntered(e);
        if (e.getButton() == MouseEvent.NOBUTTON) {
            e.getPickedNode().setPaint(Color.RED);
        }
    }

    public void mouseExited(PInputEvent e) {
        super.mouseExited(e);
        if (e.getButton() == MouseEvent.NOBUTTON) {
            e.getPickedNode().setPaint(Color.WHITE);
        }
    }

    protected void startDrag(PInputEvent e) {
        super.startDrag(e);
        e.setHandled(true);
        e.getPickedNode().moveToFront();
    }

    protected void drag(PInputEvent e) {
        super.drag(e);

        ArrayList edges = (ArrayList) e.getPickedNode().getAttribute("edges");
        for (int i = 0; i < edges.size(); i++) {
            GraphEditor.this.updateEdge((PPath) edges.get(i));
        }
    }
});

Web Accessibility
class NodeDragHandler : PDragEventHandler {
    public override bool DoesAcceptEvent(PInputEventArgs e) {
        return e.IsMouseEvent &&
            (e.Button != MouseButtons.None || e.IsMouseEnterOrMouseLeave);
    }

    public override void OnMouseEnter(object sender, PInputEventArgs e) {
        base.OnMouseEnter (sender, e);
        if (e.Button == MouseButtons.None) {
            e.PickedNode.Brush = Brushes.Red;
        }
    }

    public override void OnMouseLeave(object sender, PInputEventArgs e) {
        base.OnMouseLeave (sender, e);
        if (e.Button == MouseButtons.None) {
            e.PickedNode.Brush = Brushes.White;
        }
    }

    protected override void OnStartDrag(object sender, PInputEventArgs e) {
        base.OnStartDrag(sender, e);
        e.Handled = true;
        e.PickedNode.MoveToFront();
    }

    protected override void OnDrag(object sender, PInputEventArgs e) {
        base.OnDrag (sender, e);

        ArrayList edges = (ArrayList)e.PickedNode.Tag;
        foreach (PPath edge in edges) {
            GraphEditor.UpdateEdge(edge);
        }
    }
}

Web Accessibility
When
the mouse enters a node, we set the node's fill color to red to
highlight the node. When the mouse leaves a node, we set
it's fill color back to white. We only do this when no mouse
buttons are pressed because we don't want to highlight a node
when the mouse is dragged overtop of it. And, we consume
the drag event, so that we will not pan when a node is
dragged.
We also need to update the edges. During a drag sequence, we iterate over the dragged
node's edges and call UpdateEdge on each one. Recall this
method gets the two nodes each edge connects, and
then repositions the edge to the center points of each connected
node.
3. Add the Canvas to a Window
Now we are ready to add our new component to the window.
We create a JFrame in Java or a Form
in .NET as a wrapper for our component. Add the following class
to your project.
Java |
C#
public class GraphEditorTester extends JFrame {
    public GraphEditorTester() {
        setTitle("Piccolo Graph Editor");
        setDefaultCloseOperation(JFrame.EXIT_ON_CLOSE);
        GraphEditor graphEditor = new GraphEditor(500, 500);
        getContentPane().add(graphEditor);
        pack();
        setVisible(true);
    }

    public static void main(String args[]) {
        new GraphEditorTester();
    }
}
Web Accessibility
public class GraphEditorTester : System.Windows.Forms.Form {
    public GraphEditorTester() {
        GraphEditor graphEditor = new GraphEditor(this.ClientSize.Width,
            this.ClientSize.Height);
        Controls.Add(graphEditor);
        graphEditor.Bounds = this.ClientRectangle;
        graphEditor.Anchor = graphEditor.Anchor |
            AnchorStyles.Right | AnchorStyles.Bottom;
    }

    static void Main() {
        Application.Run(new GraphEditorTester());
    }
}
Web Accessibility
First, we create an instance of our GraphEditor component and add it
to the form's list of controls. Then, we anchor or new
component to the sides of the window, so that it will get
resized when the window is resized.
|